Overview
Webhooks allow you to receive real-time notifications for subscribed events in the Snappy system and are meant to be used as triggers for process flows within your own software systems.
These notifications are HTTPS REST calls to a URL you specify, encapsulating information about the specific event. You can subscribe to all webhooks, or a subset of them.
See a list of all supported webhook event types by Snappy - here.
To set up Webhooks and start getting events from Snappy, do the following steps:
1. Set up an HTTPS endpoint in your application that can accept webhook requests via a POST method.
Set up an HTTPS endpoint in your application that can accept webhook requests via a POST method.
This endpoint should be able to handle POST requests with a JSON payload, and should quickly return a 200 OK successful response within 10 seconds.
In case the response is missing, Snappy will assume delivery failure and continue to retry sending the same event.
2. Enable webhooks and setup in Snappy Dashboard
To create a new Webhook on the Snappy Dashboard, complete the following steps:
-
Navigate to the Sharing & Access under the Company Settings page.
-
Enable the webhooks for your organization
-
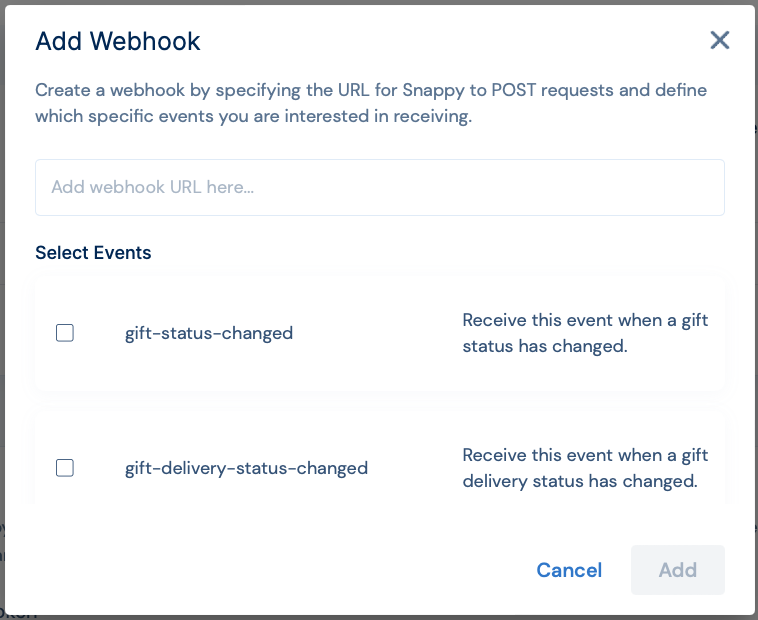
Click Add Webhook
-
Specify the URL for Snappy to POST requests
-
Choose the relevant events
-
Click Add
3. Verify your new webhooks setup
Once you completed the setup, you can test it by triggering a template POST request to your webhooks URL with a verification token. This step helps ensures that the webhook events are reaching its intended destination, and helps you troubleshoot any issues with webhook delivery.
To perform the test simply choose the relevant set up and choose the test action.
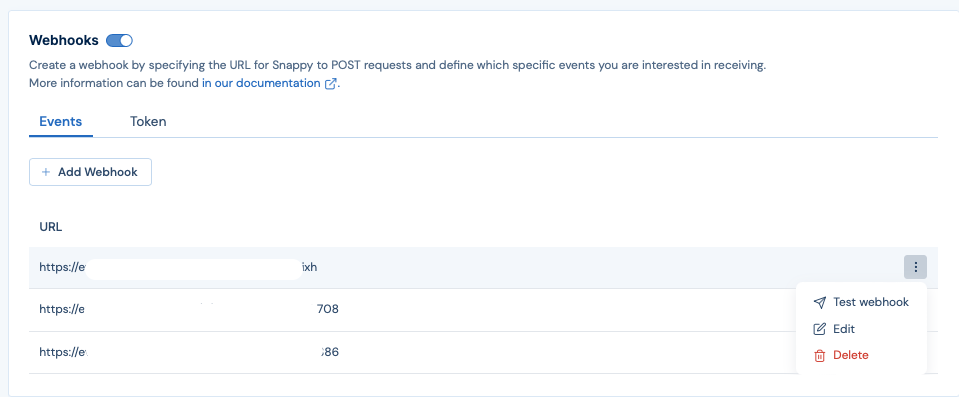
If your endpoint does not receive a template event, please ensure that your webhooks endpoint is set up correctly.
4. Secure your webhook endpoint
You'll want to ensure that your API endpoint is verifying that incoming POST requests are actually from Snappy and that payloads haven't been compromised.
This is done by comparing the X-Snappy-Signature from the webhook's headers of the incoming request to an encoded combination of your organization's webhook token and the payload attached to the incoming request.
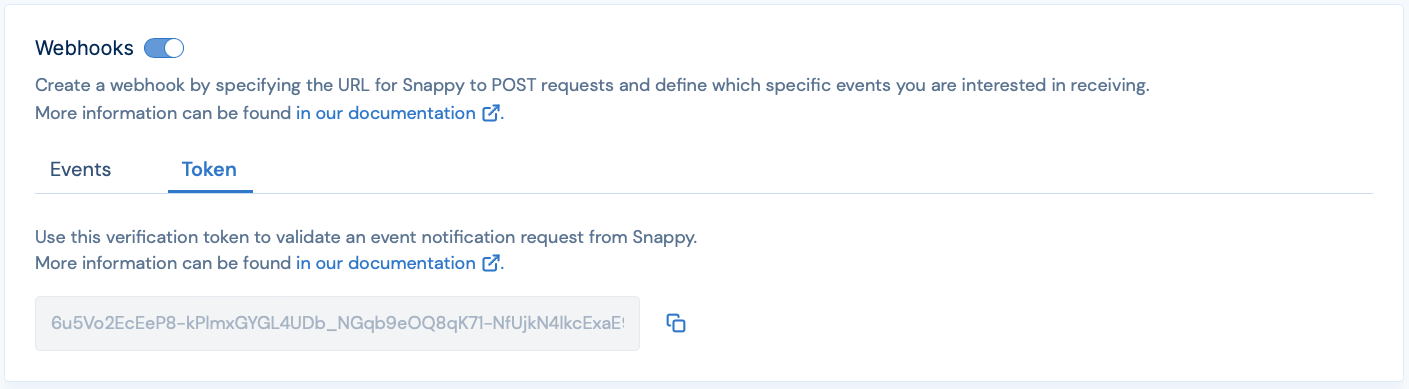
Under your webhooks configurations, you should see the security token. This token is unique to your organization and can be regenerated if it ever becomes known by an untrusted third party.
The signature is a SHA-256 hash, where the key is the UTF-8 encoded token and the request body as the data.
const crypto = require("crypto");

// Swap YOUR_WEBHOOK_TOKEN below with the token from your Dashboard

const rawRequestBody = JSON.strigify(request.rawBody);

const signature = crypto.createHmac("sha256", "YOUR_WEBHOOK_TOKEN").update(rawRequestBody).digest("hex");

console.log(signature === request.headers["X-Snappy-Signature"]);
Updated 4 months ago